Onboarding
Get your team set up on Bluerabbit in just 3 minutes
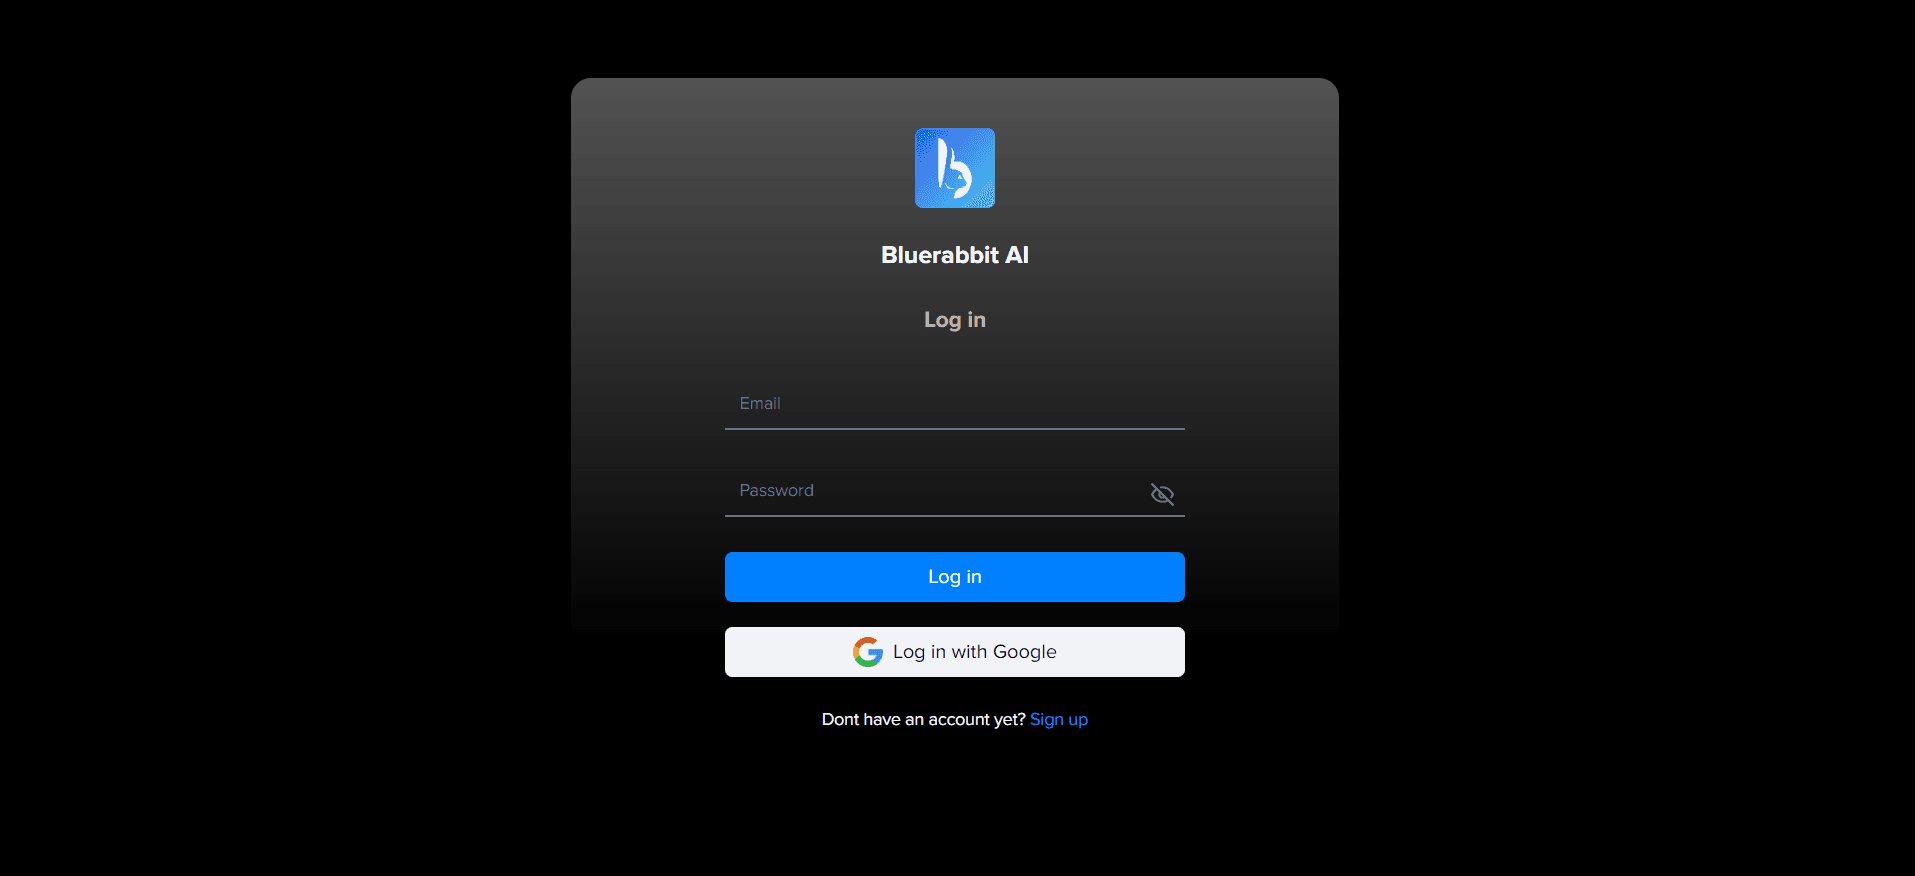
- Log in to Bluerabbit (ai.bluerabbit.co) with Google or with email/password and complete your personal/organization information.
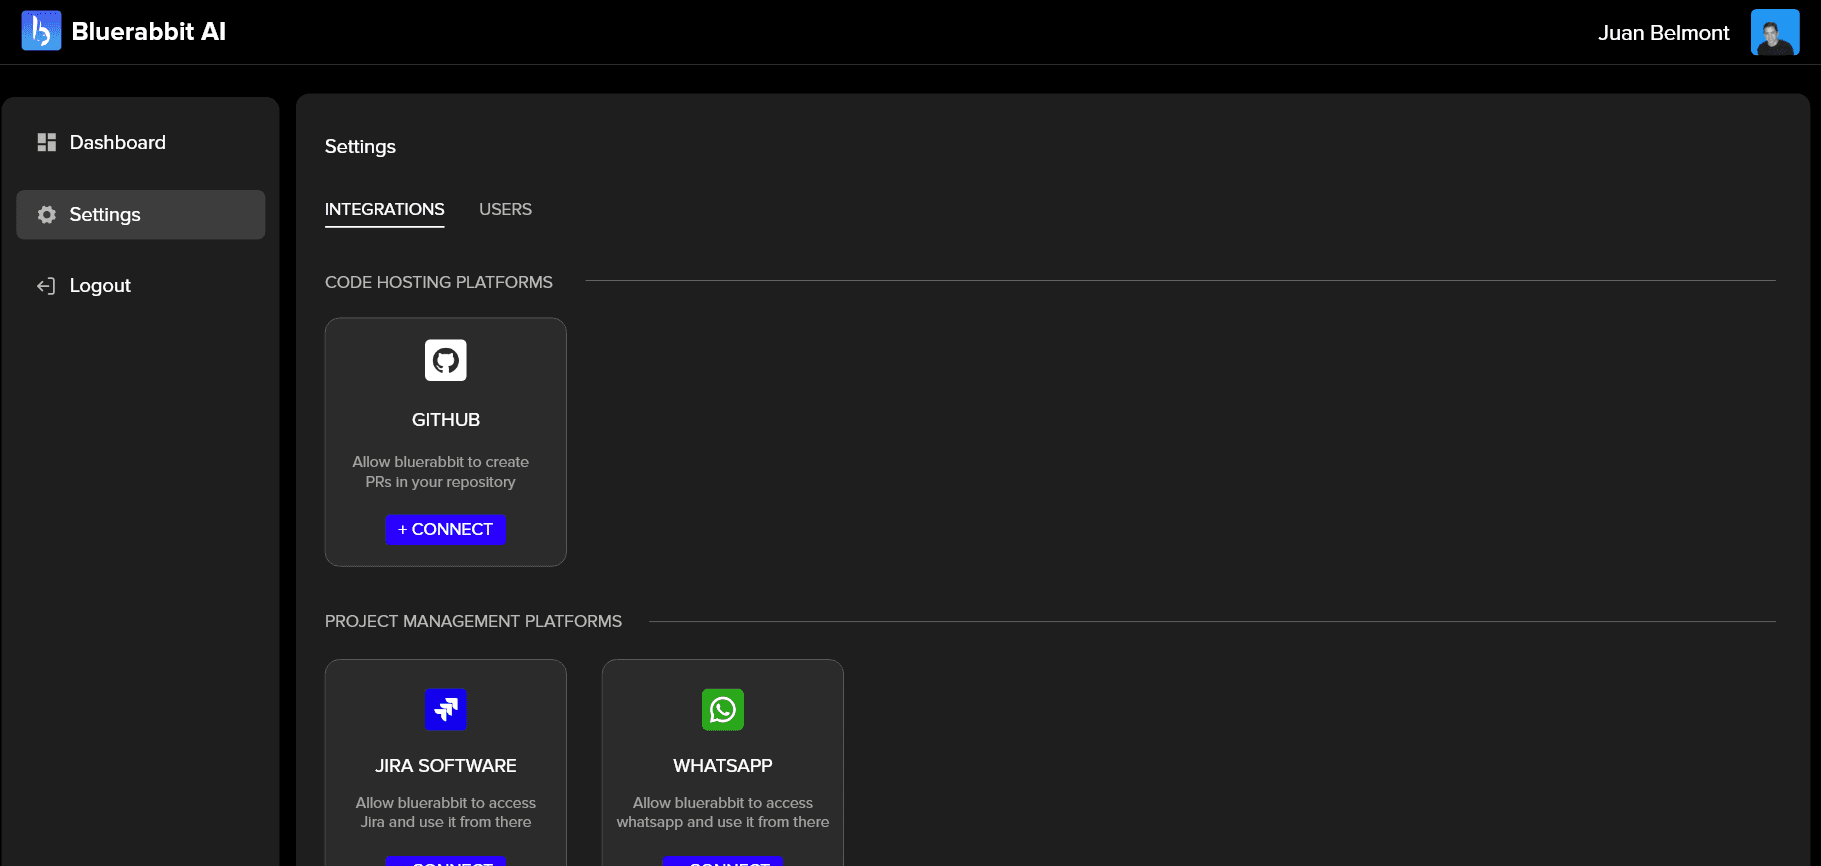
- After logging in, enter the Settings screen. Find Github and click "Connect".
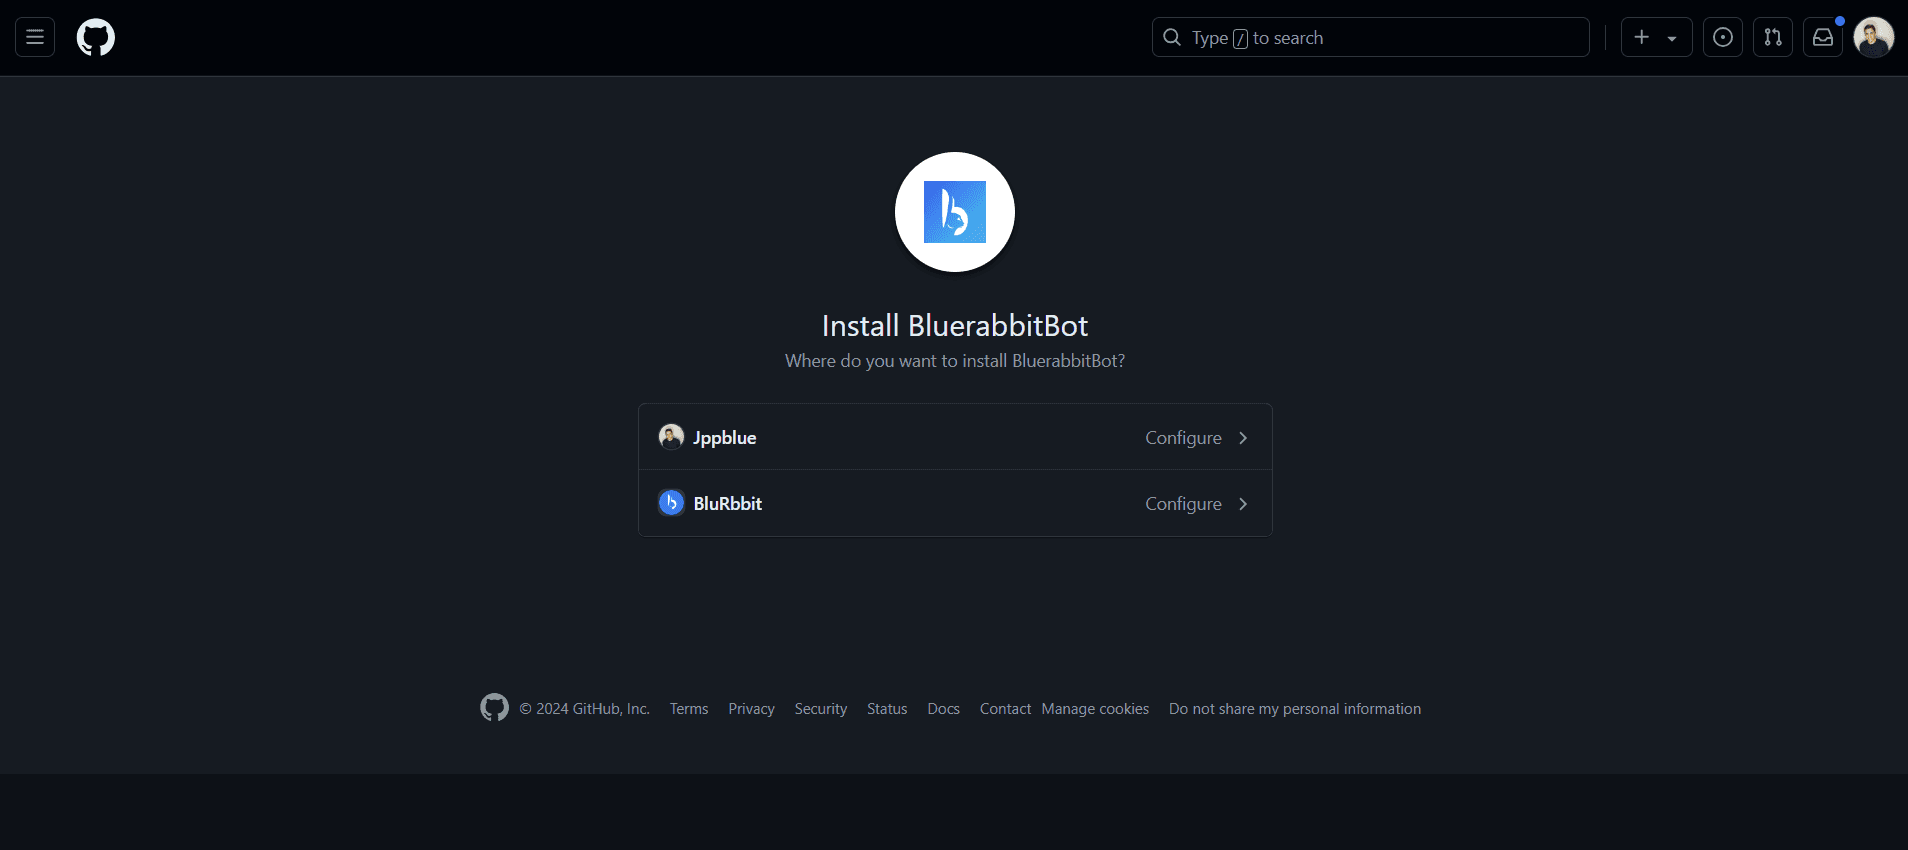
- Click on your GitHub organization.
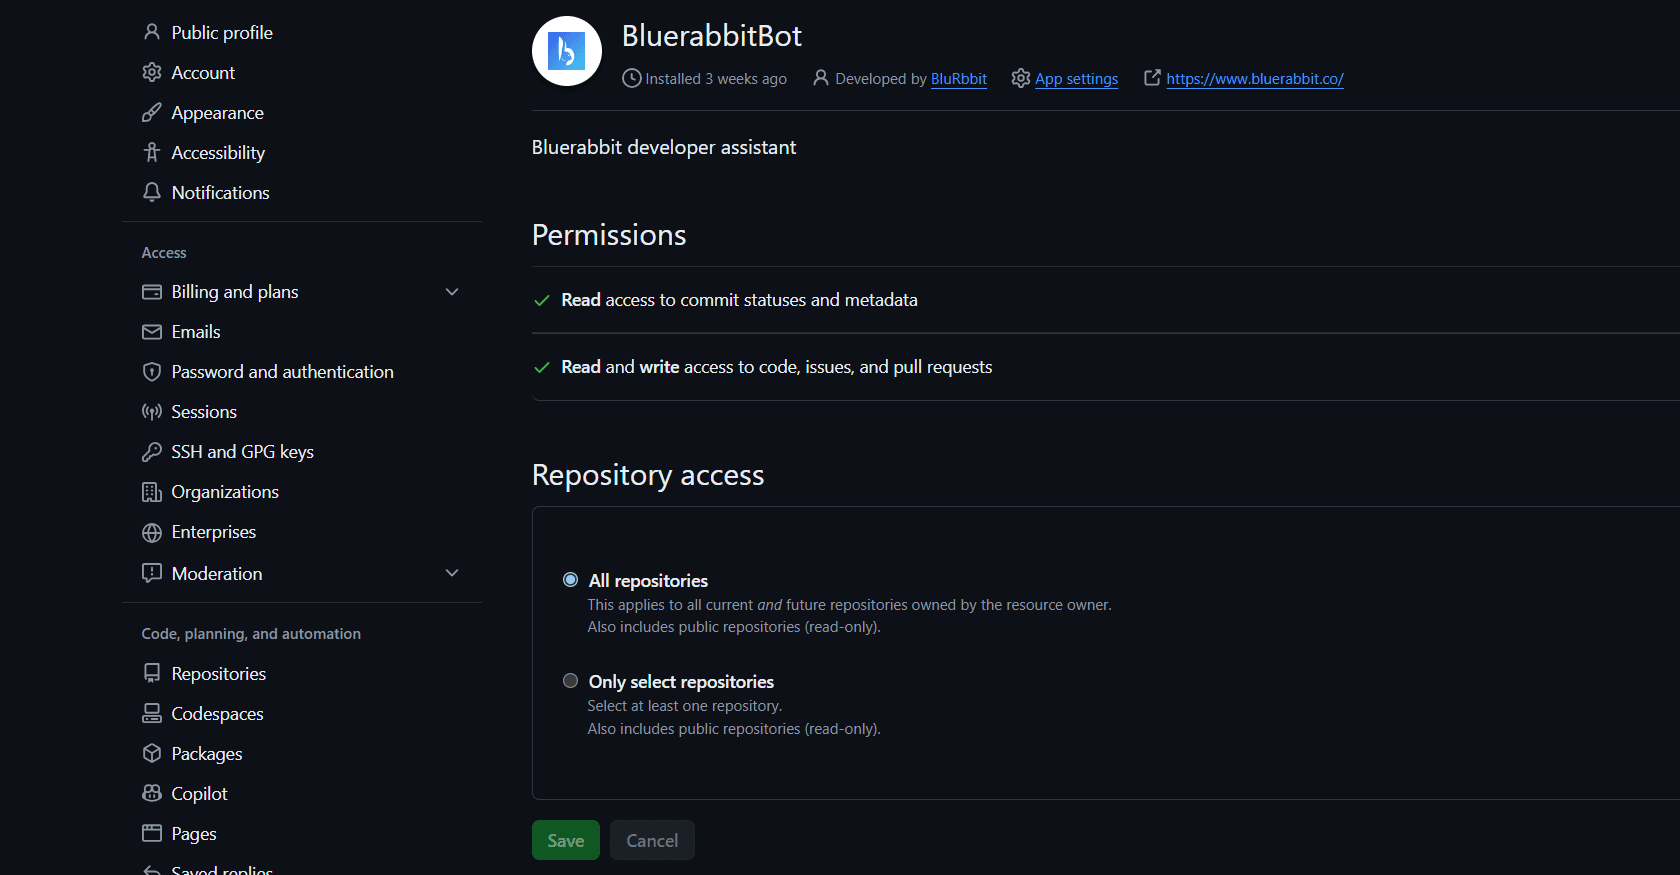
- Decide if you want to authorize all repositories or just select ones in your organization. Then click "Install."
- Your repos are synced. Once you finish doing all those steps, if you want to change the Base Branch, just click in default Base Branch inside the issues you created. You can pick in which branch bluerabbit is going to make the fixes and improvements
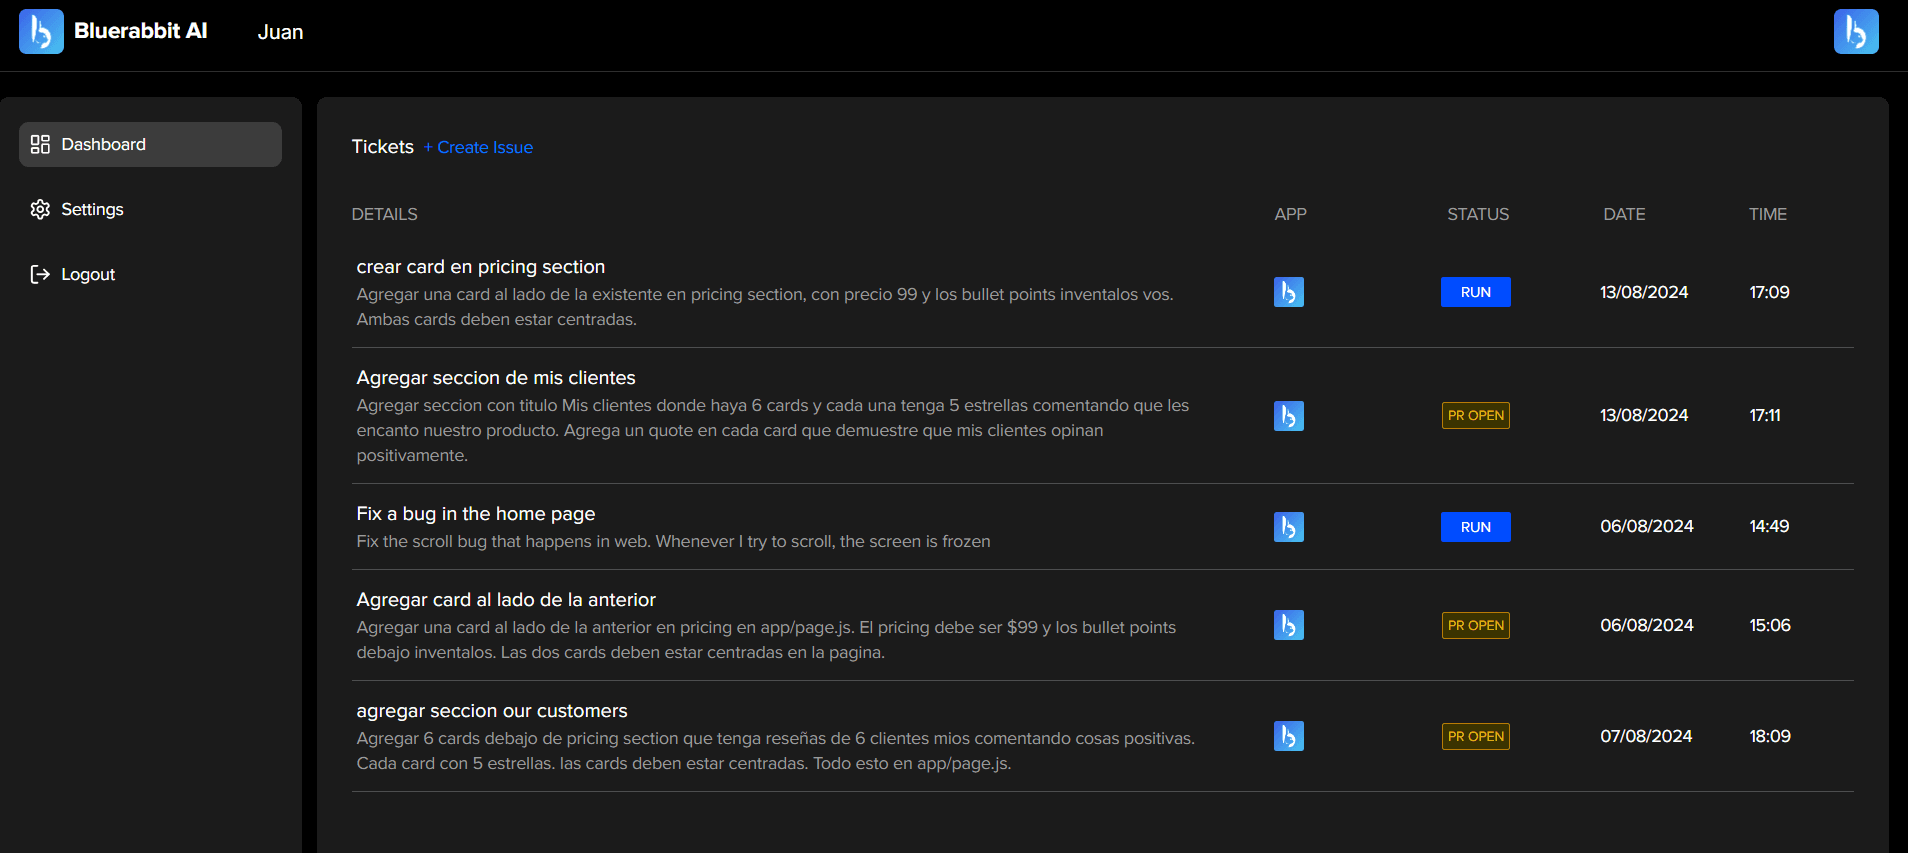
Repos Synced! 🙌
- Go to Dashboard in our Platform.
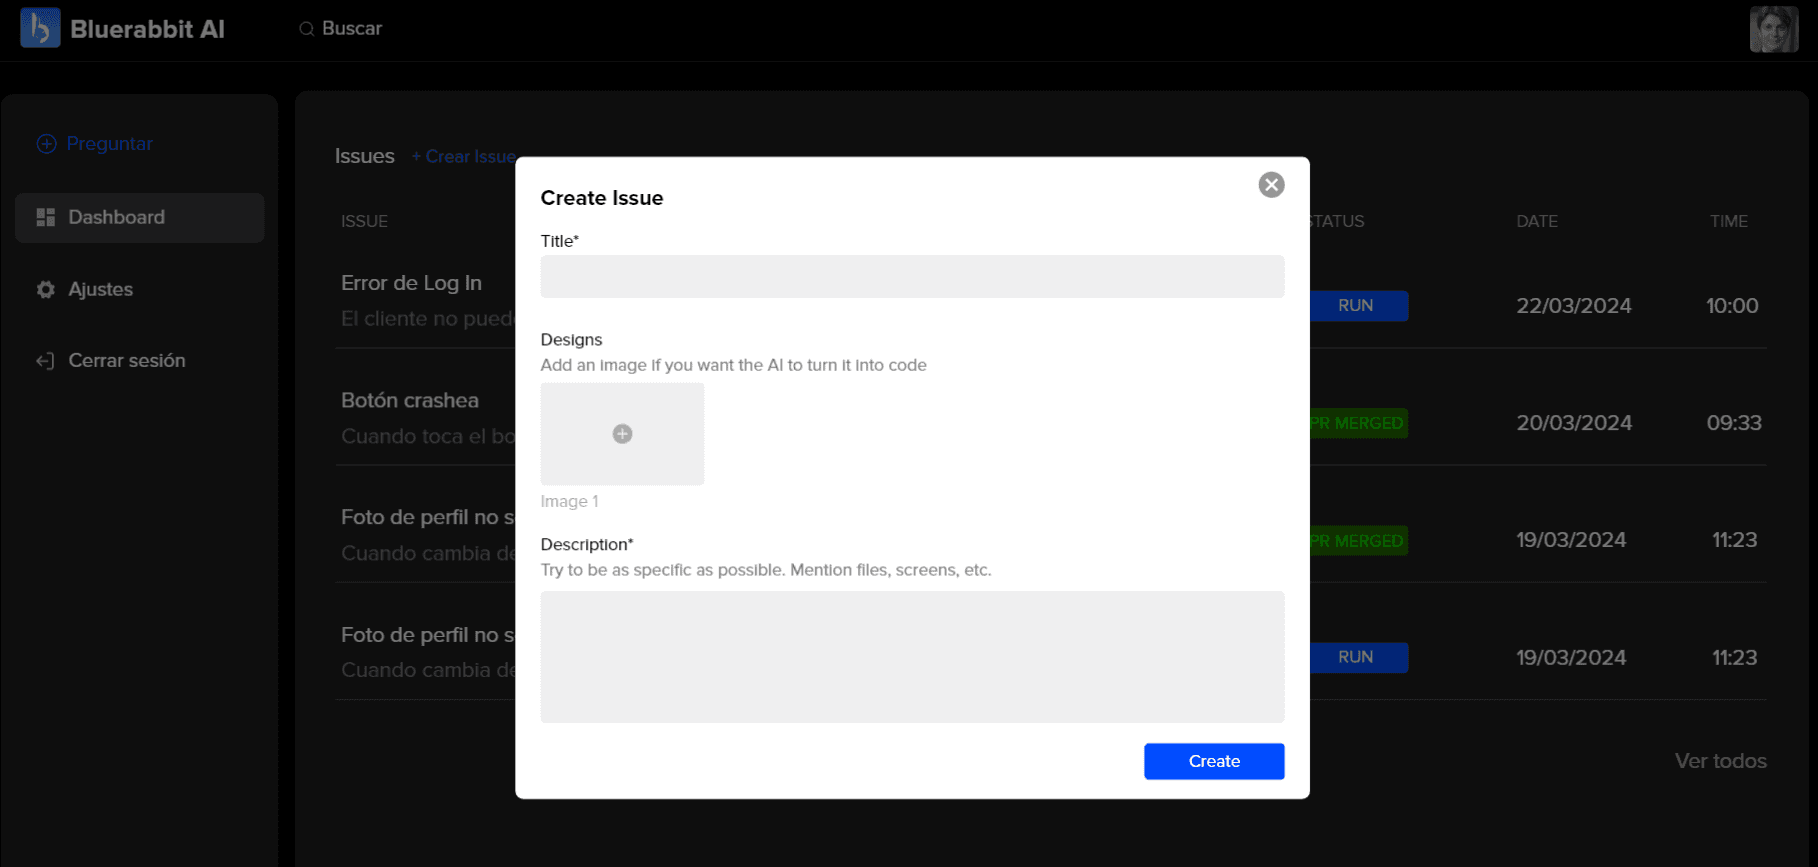
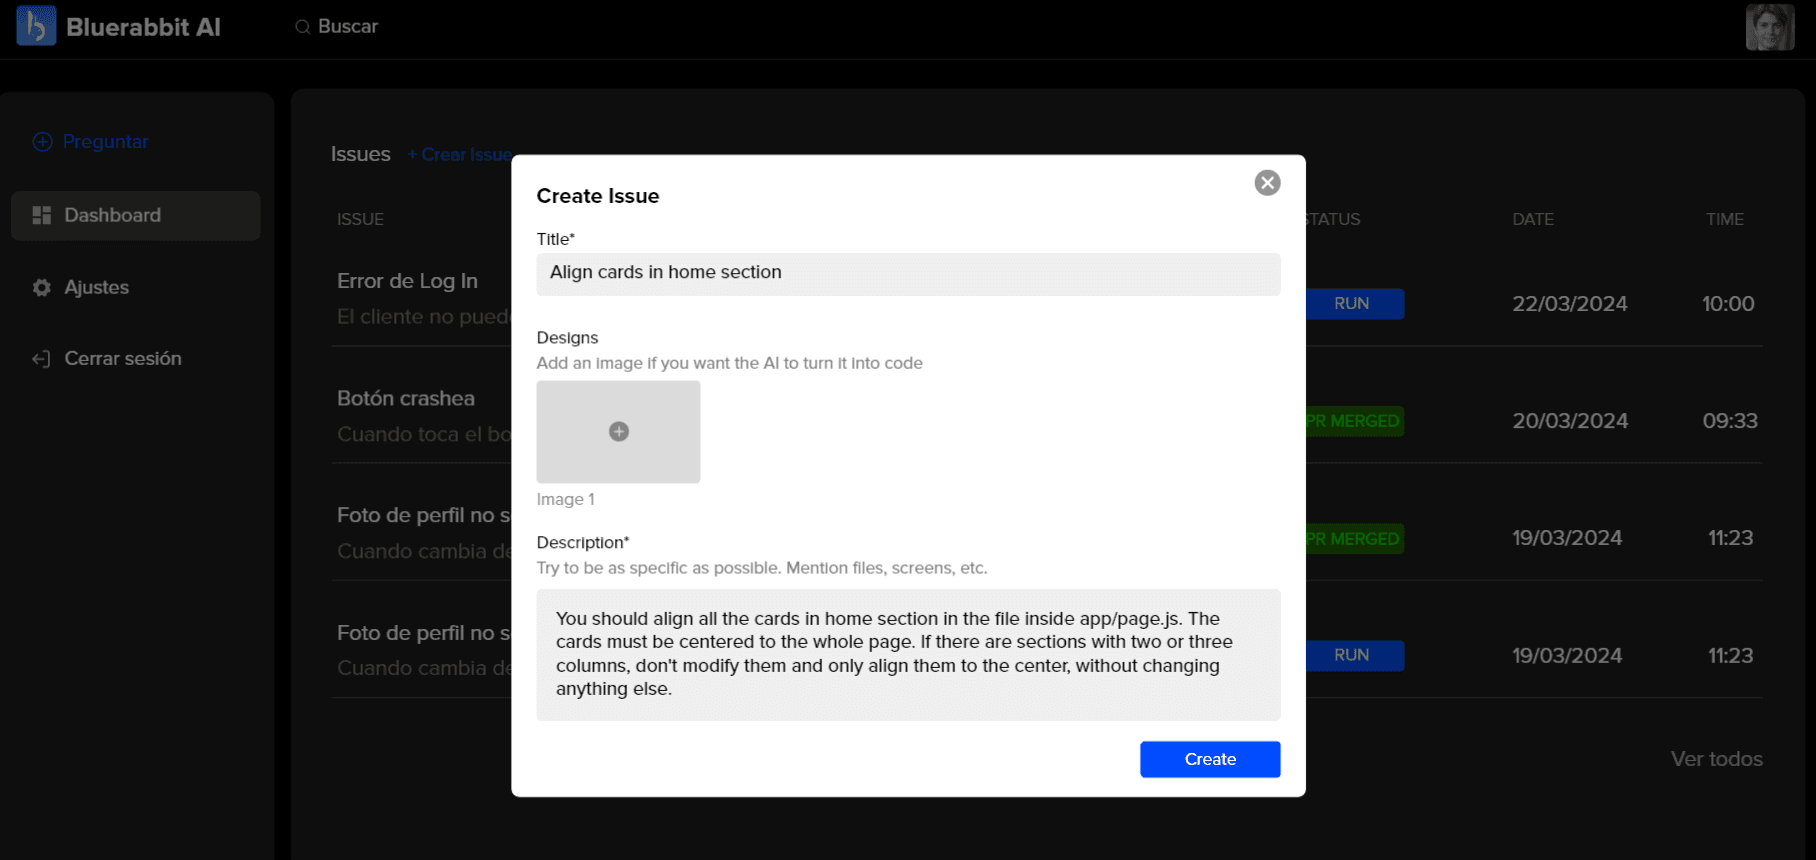
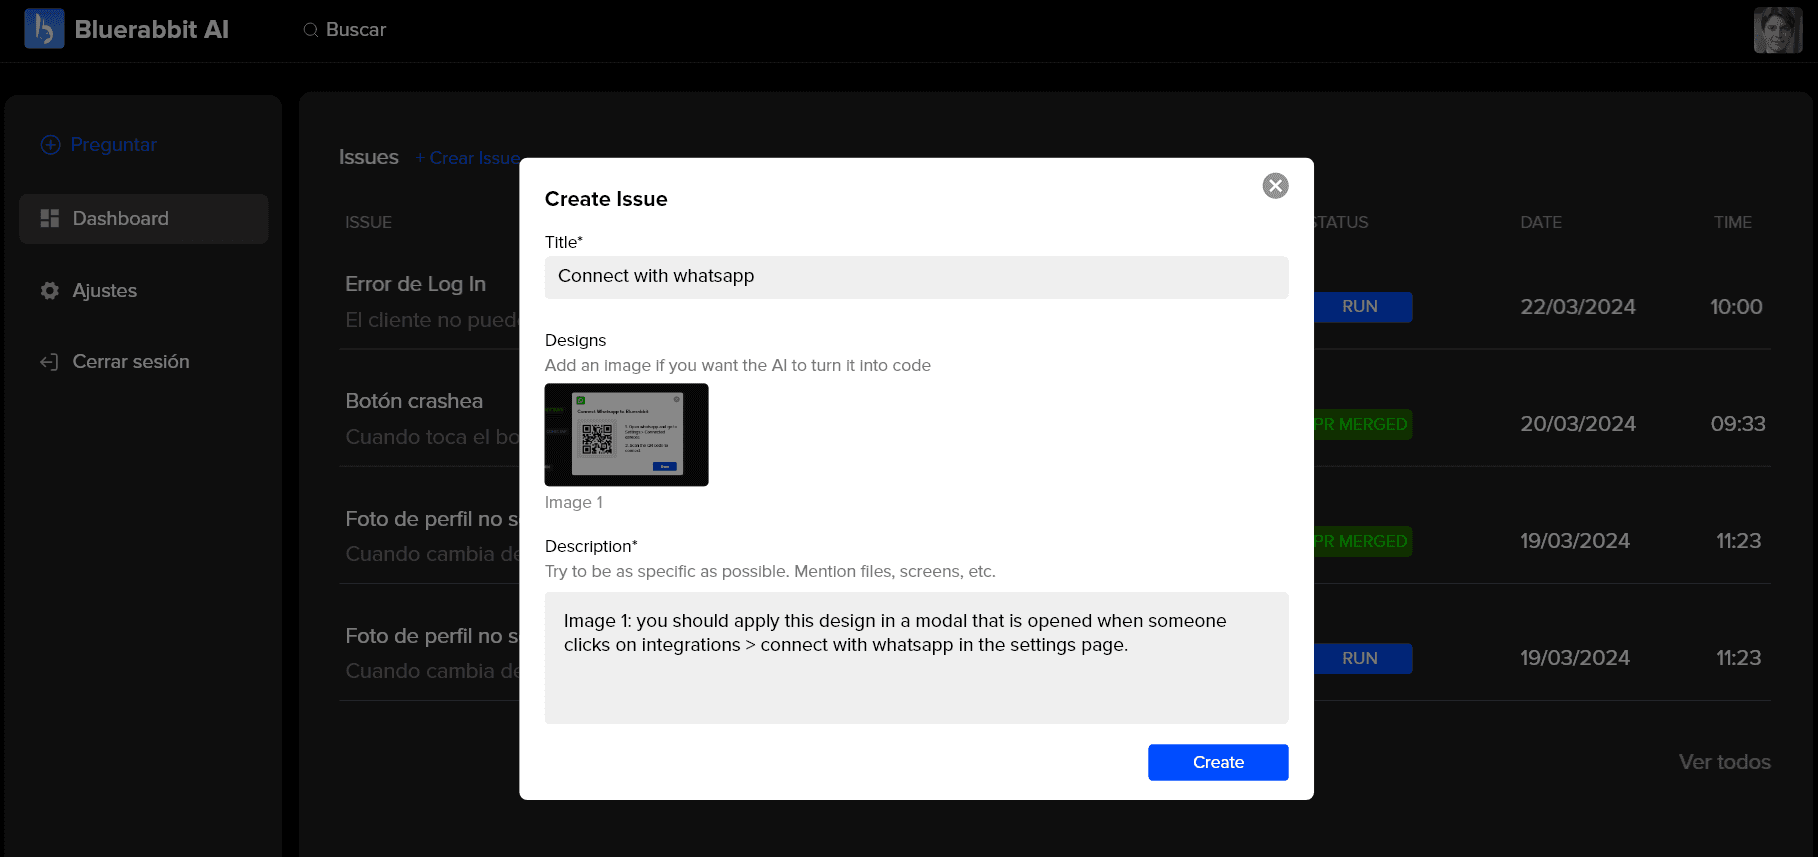
- Click on Create Issue. A modal will open.
- Write the title and the description. Try to complete the description as detailed as possible, mentioning the files to be modified, screens, etc. Then, click on create.
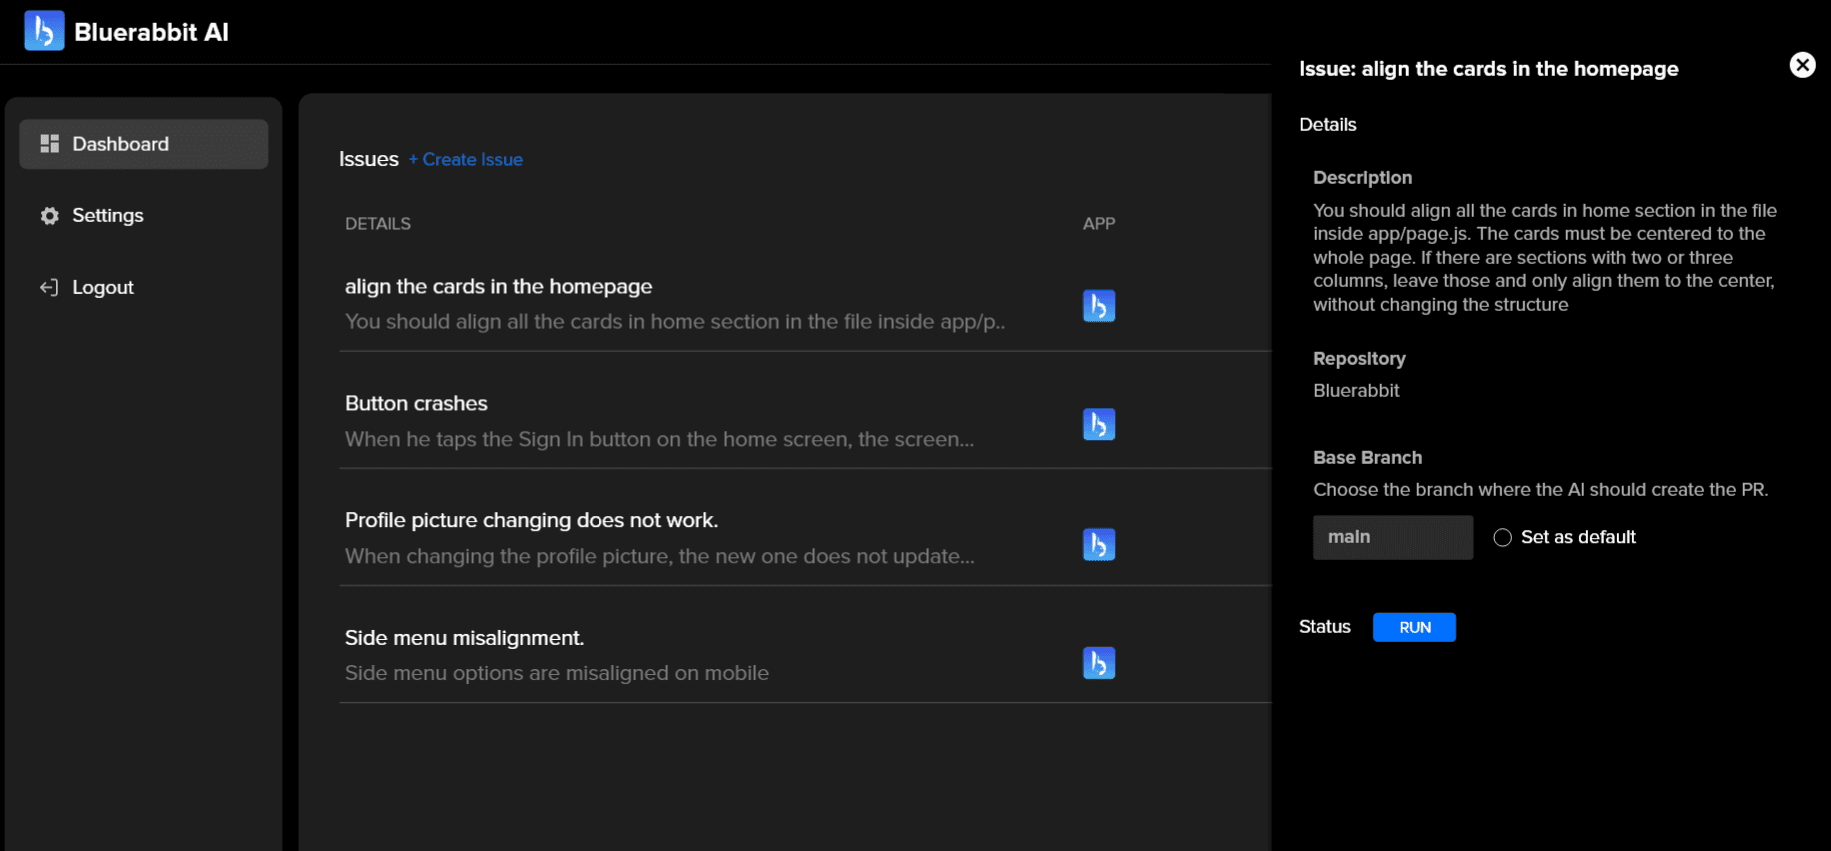
- Open the task you created and a drawer will open from the right.Choose the repo and the branch you want our AI to create the PR.
- Click "RUN" and wait till the PR is created! It will be created in your repository on Github.
Designs to code 🎨
You can ask the AI to convert designs into code, saving you 80% of the work!
- After clicking on create an issue, upload an image with the design
You should upload the design you want our AI to turn into code
- Remember to specify in the description things like files, screens and animations.
- Click on create and boom! See the magic happens... The AI will create an independent component with the design
*Note: In most cases you should retouch margins, borders, etc to perfectly adapt to your code, but it will save most of your time
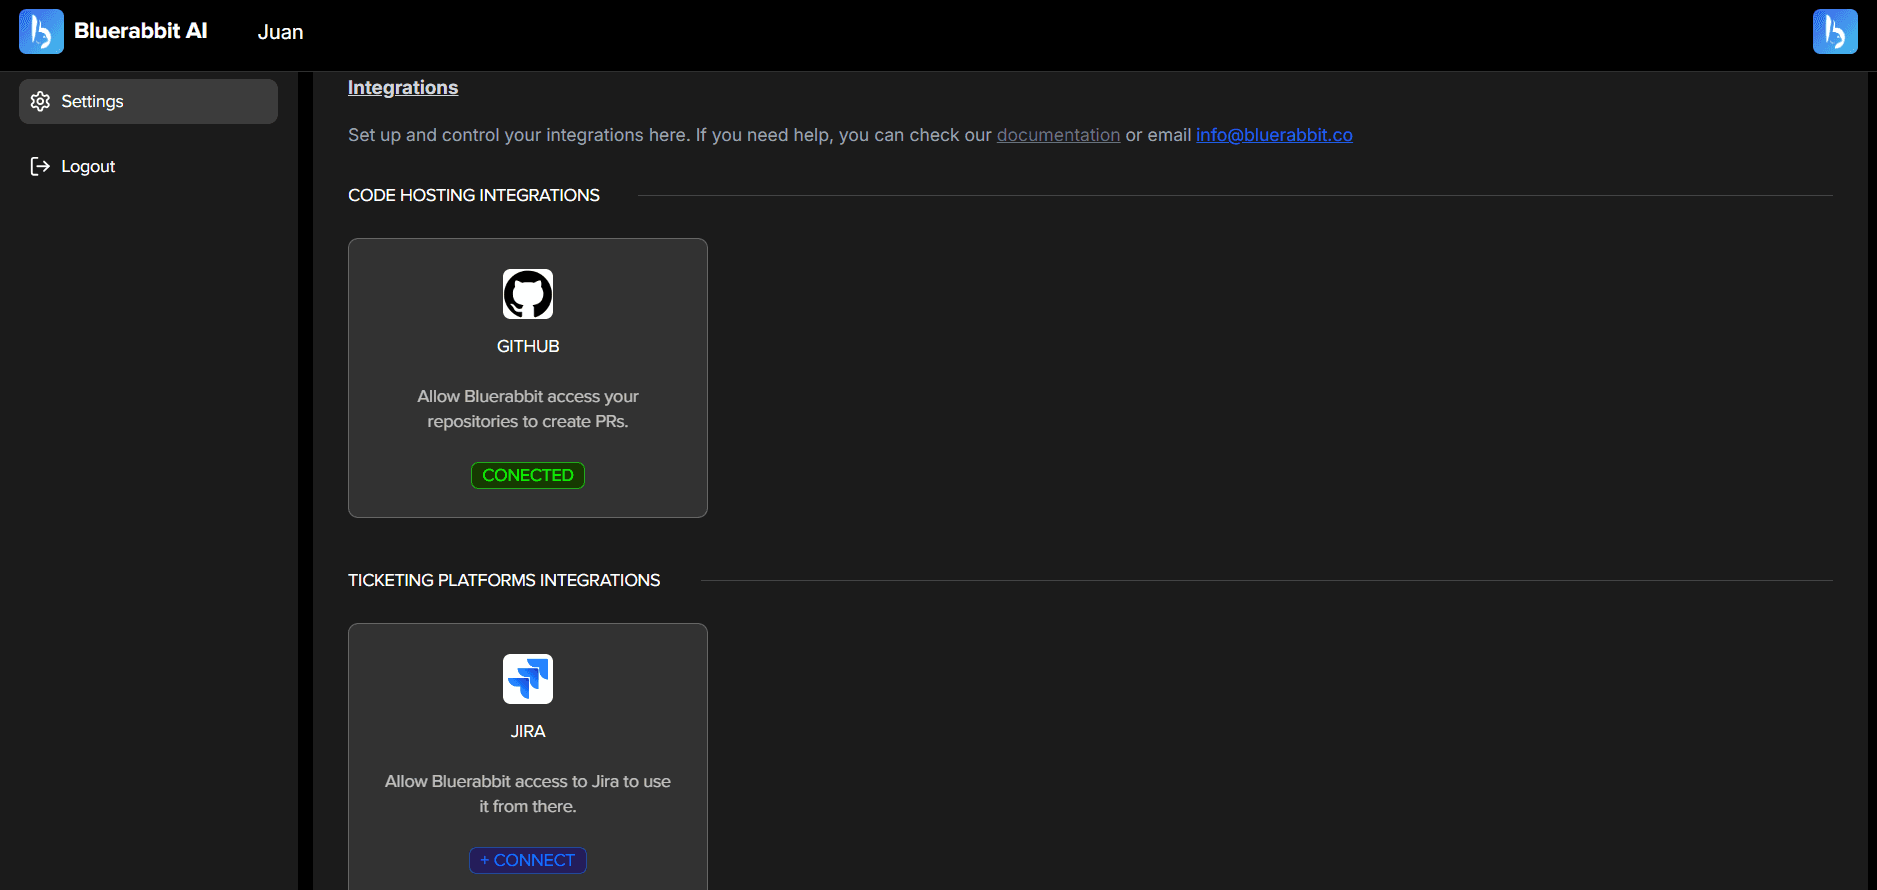
✅ Integrating Ticketing Platforms
Jira
- Go to Settings page in Bluerabbit's Platform and in the Jira integration card, click connect.
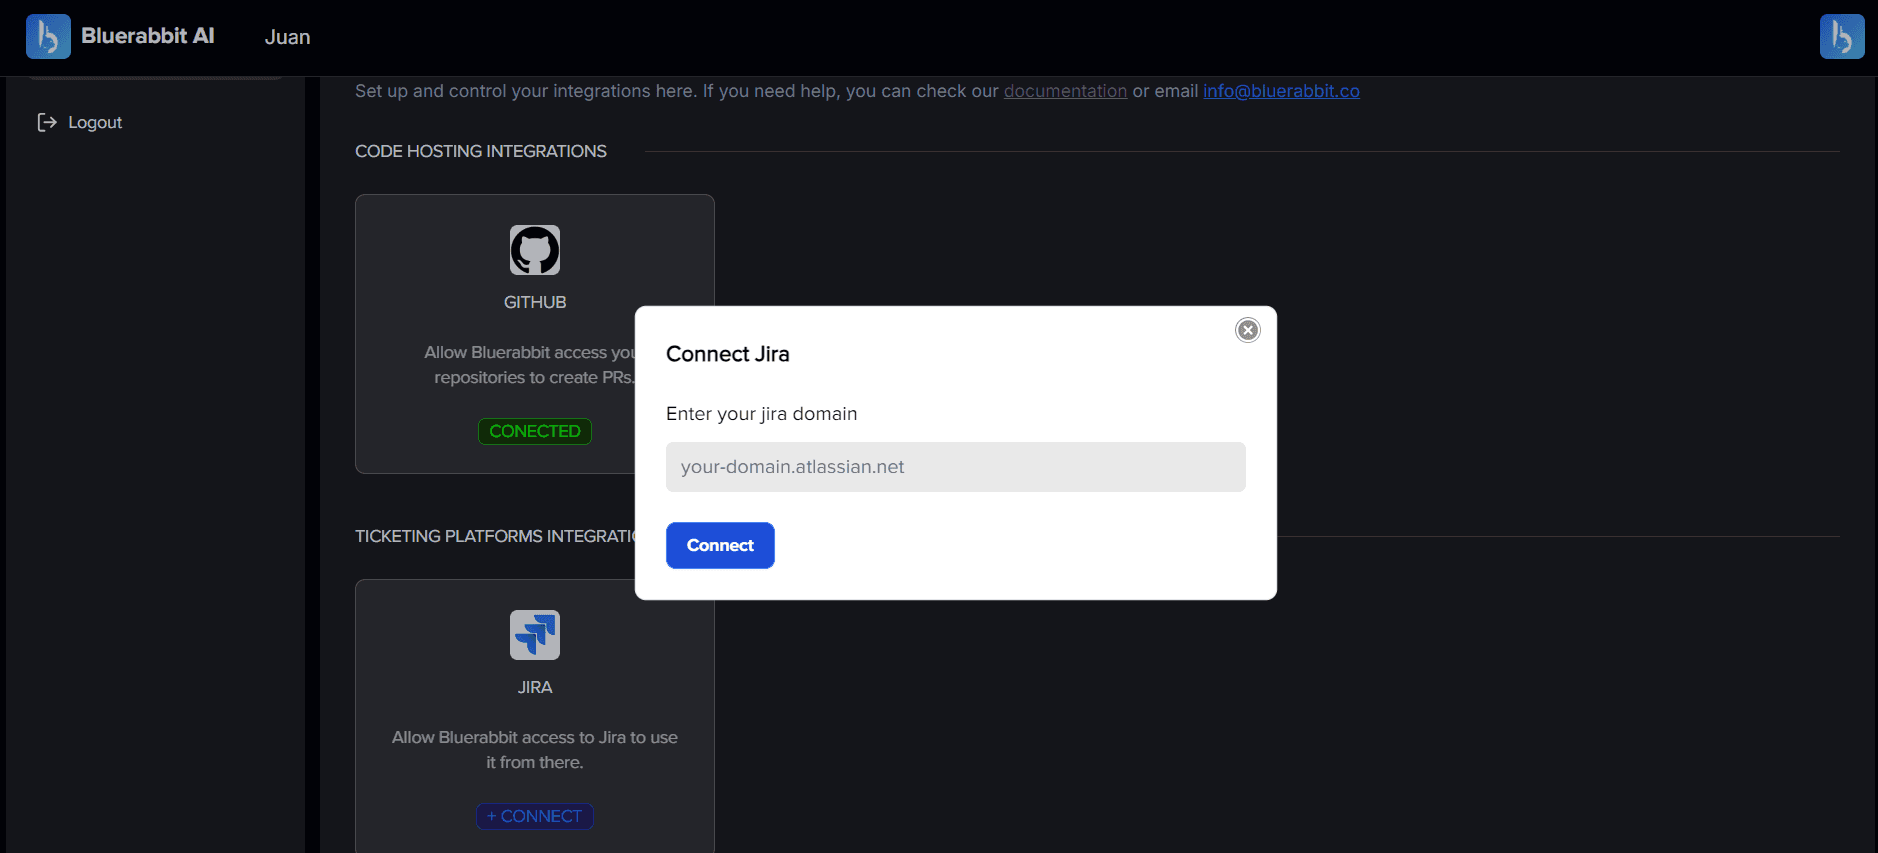
- A modal will open where you will need to enter the URL of your Jira. Enter it like this: bluerabbitt.atlassian.net . Then, click connect.
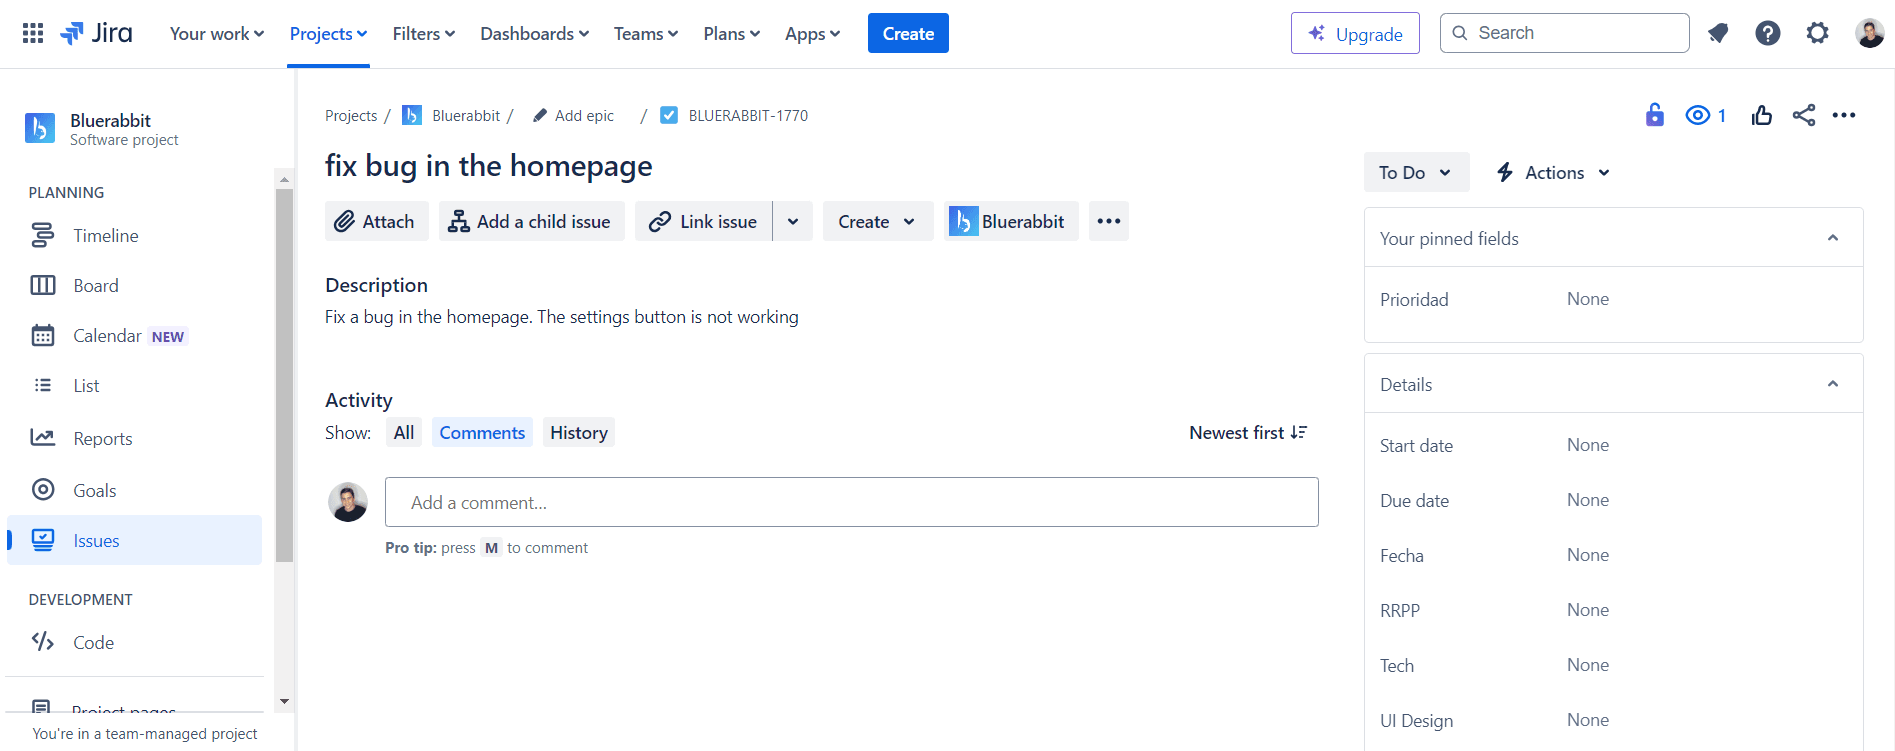
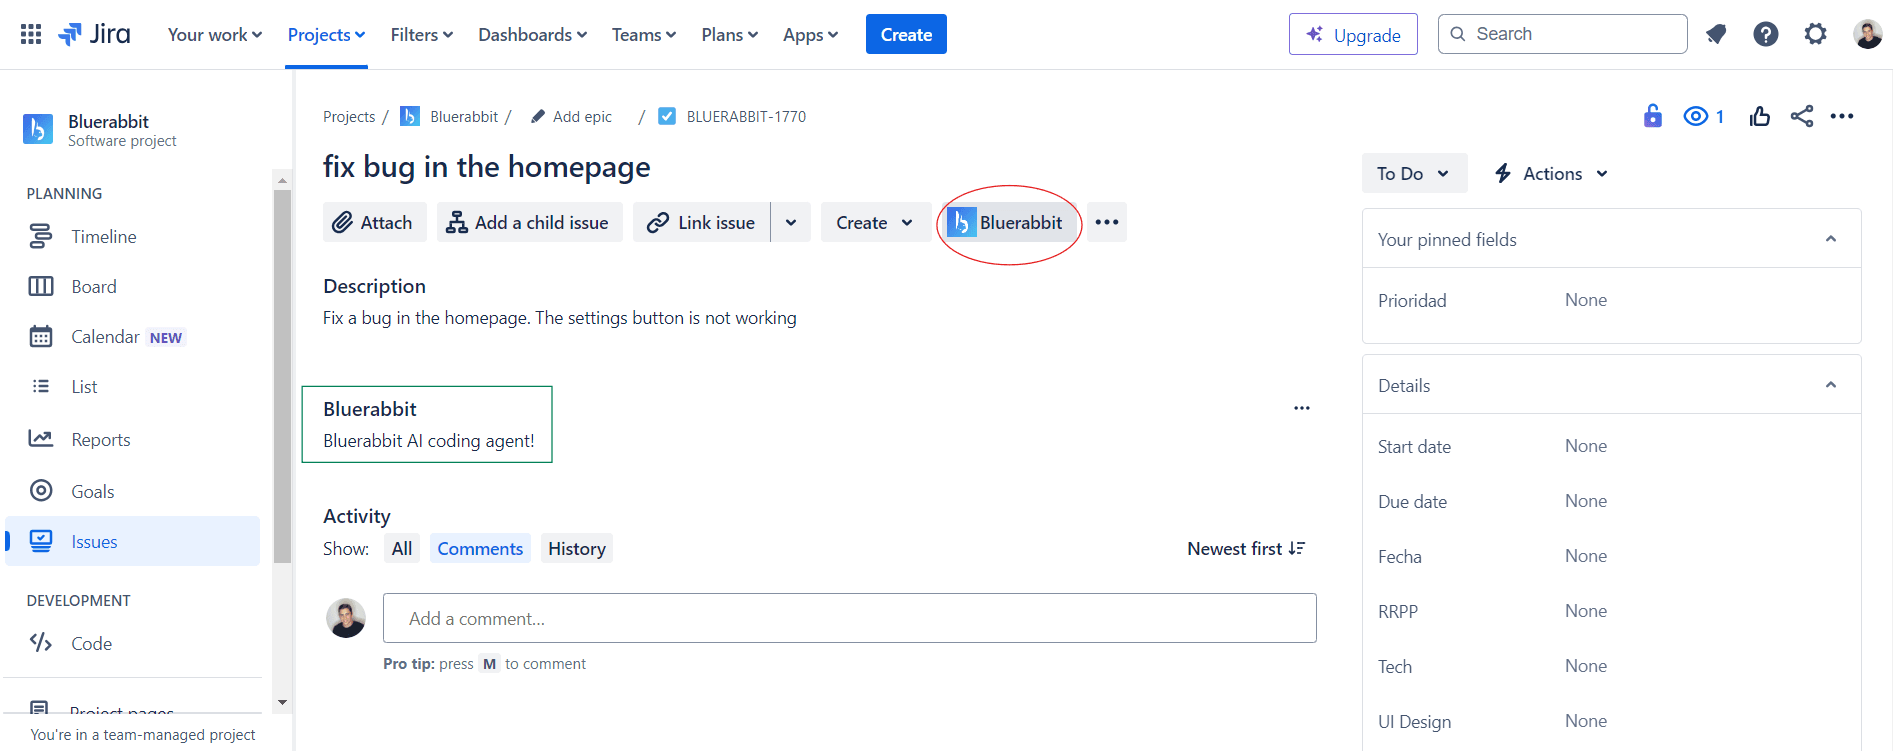
- Once the URL is entered, you can go to Jira to assign your first ticket.
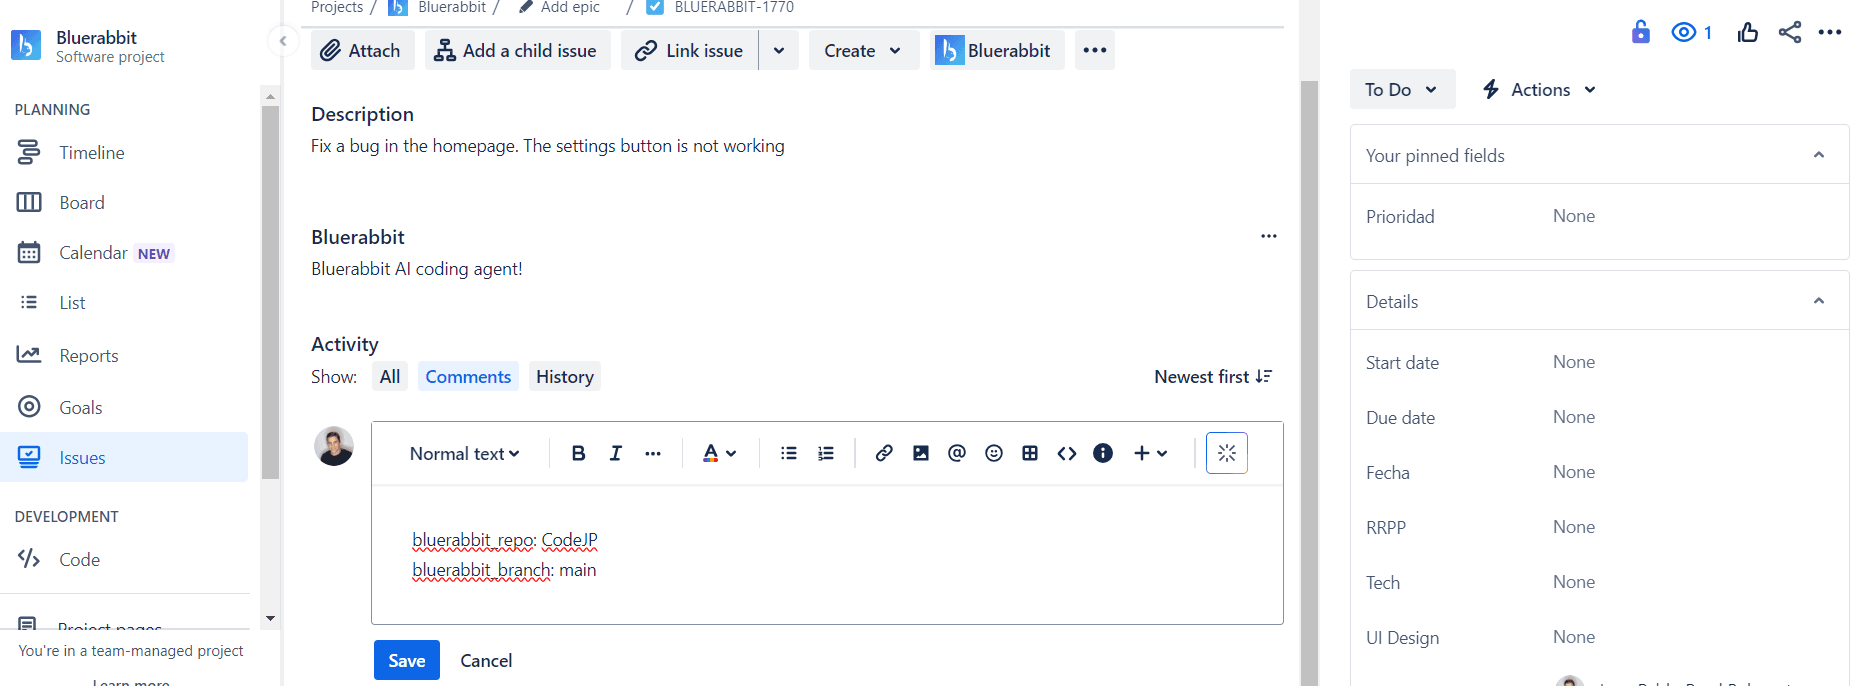
- First, you should click in the tag that says "Bluerabbit" above. A description should appear as shown below in green.
- To assign it, you need to comment on the task with the following:
- Specify the repo using: "bluerabbit_repo: repo name"
- and specify the branch using "bluerabbit_branch: branch"
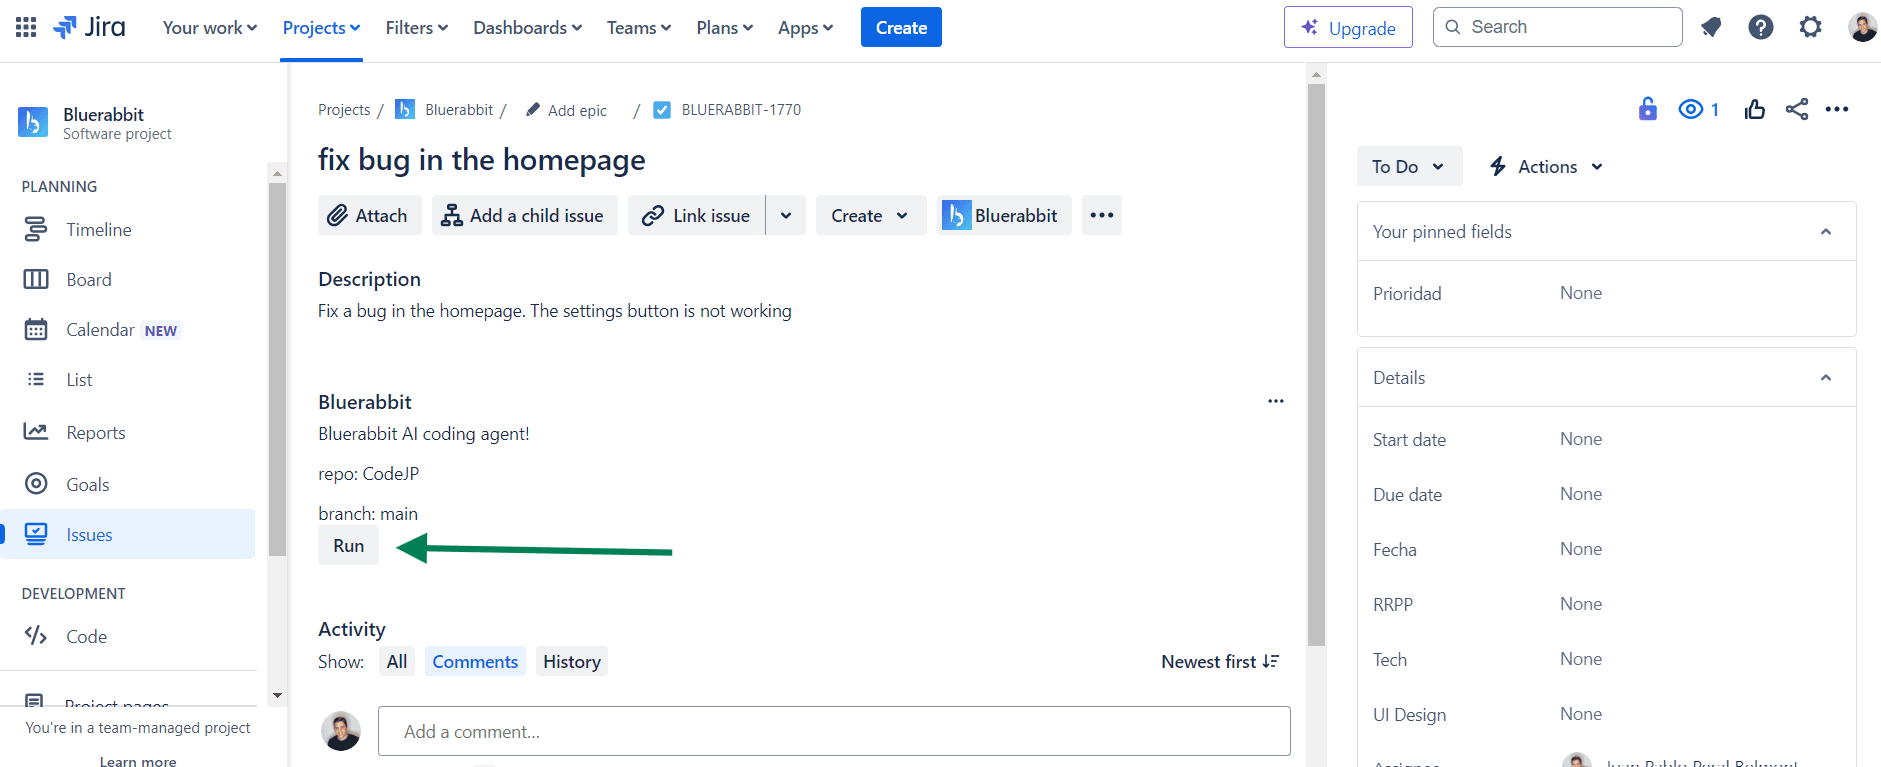
- Then, the RUN button will appear in the description; click it and our AI will start working in the task.
Prompts
- Be specific.
You can create issues in our platform or directly from your ticketing platform. Try to clearly describe what you want. Include relevant details and context to help Bluerabbit understand your request. Try to mention the documents to be modified.
- Use Simple Language
Write your prompt in straightforward terms. Avoid jargon and complicated language to make it easier for Bluerabbit to understand your request.
- If the AI didn't get it, try again.
If the AI misunderstood your request, try stating it in a different way. Sometimes changing the wording can make your intention clearer.
- If you want to modify the PR, you can comment directly on GitHub.
See how to do that in next section!
Comments 💬
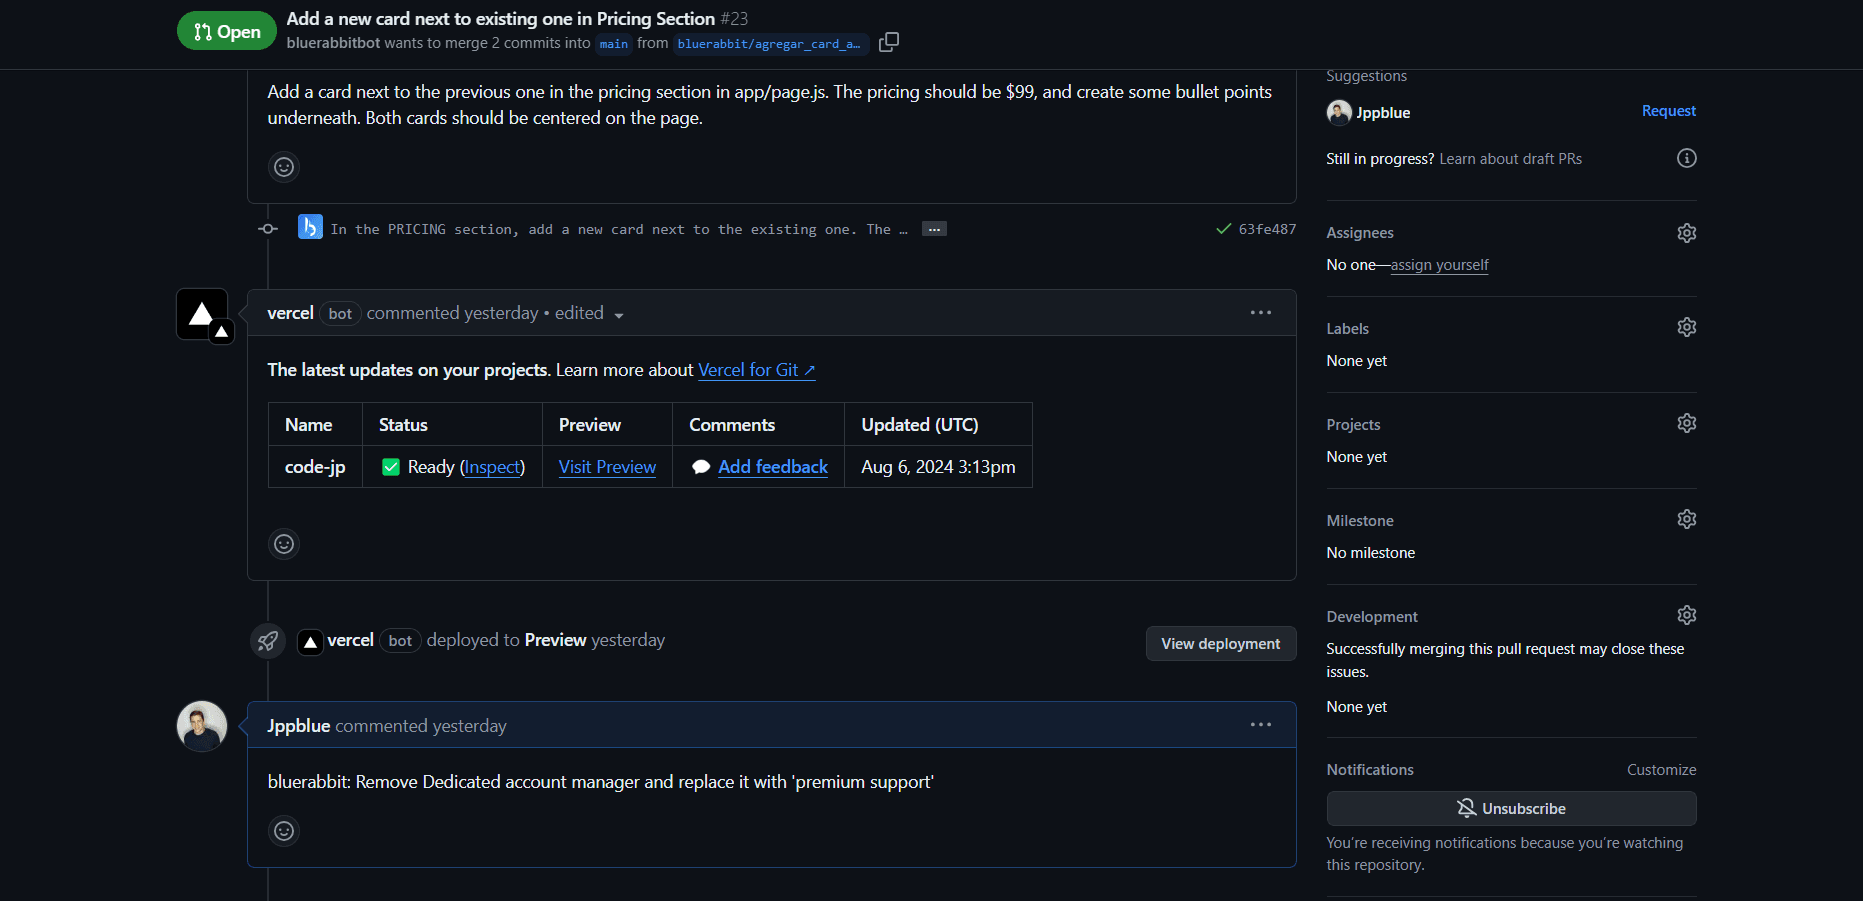
This will be probably one of the most interesting parts of our solution. You can comment the PRs generated by the AI if you want to modify something in the code created.
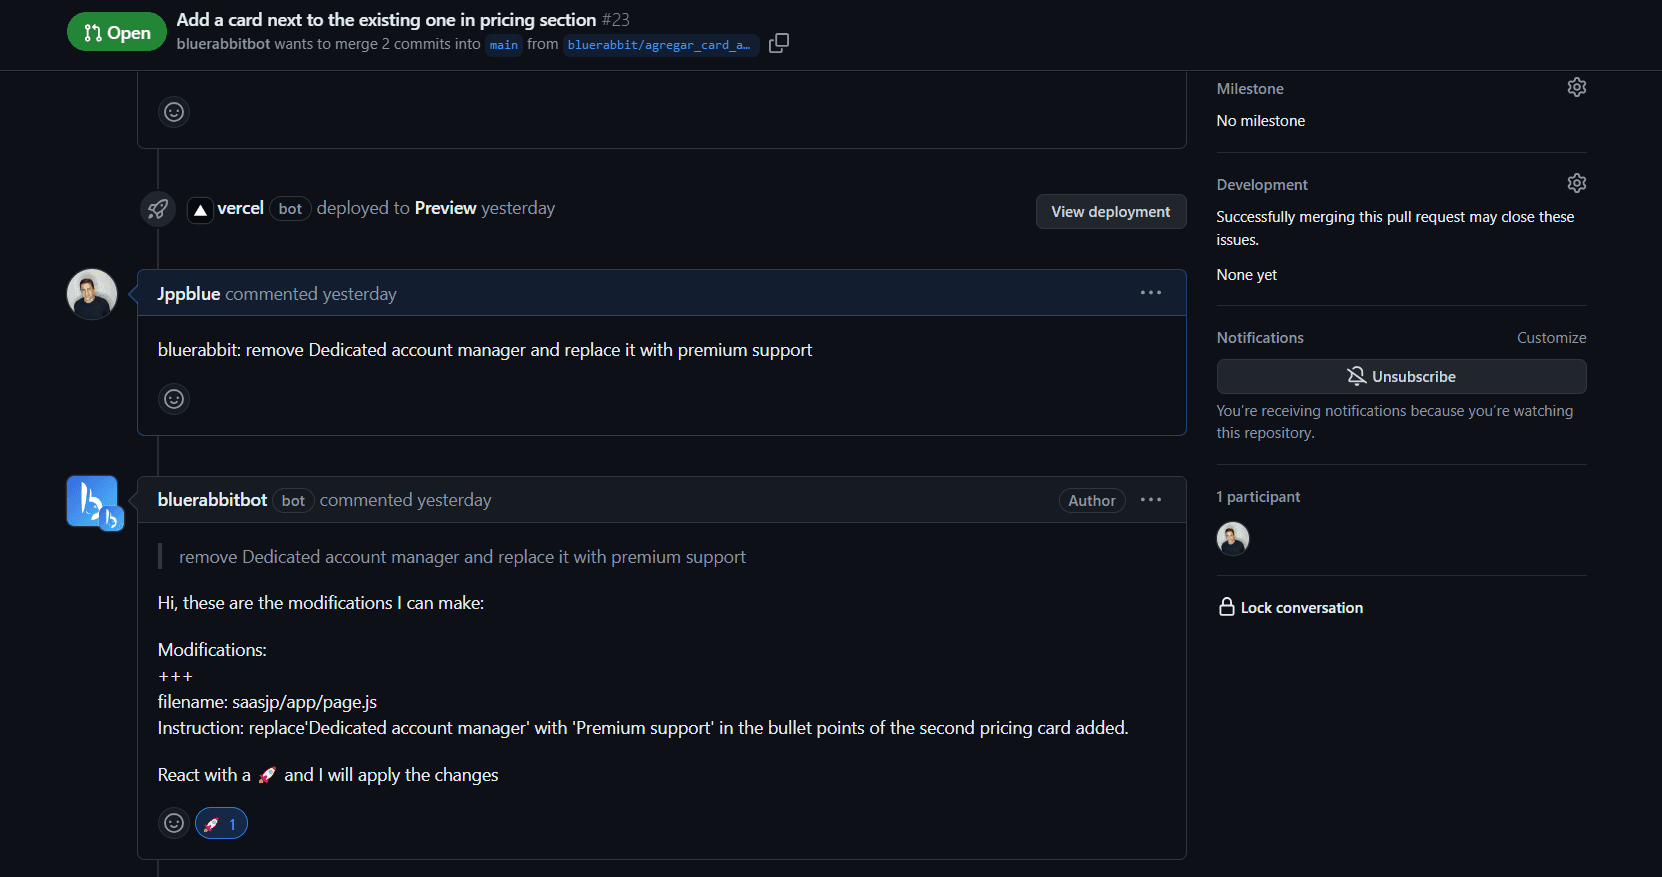
- Tag Bluerabbit on Github
By writing "Bluerabbit:<comment>" the AI will read your request and start processing it.
- Confirm the modifications
To confirm modifications, you need to react the comment with a 🚀.
- Review the files changed and merge the PR!
If you get this far it means you understood how our platform works.
Feel free to reach out if you have any other question.